Work with us


Vaelgor & Ezzorak Guide: Voidspire Raid Boss Strategy for WoW Midnight
5 min read
Key Takeaways
- Vaelgor & Ezzorak is the fourth boss in the Voidspire raid, WoW Midnight Season 1. Twin corrupted red dragons
- Keep their health within 10% of each other at all times. If the gap exceeds 10%, Twilight Bond gives both dragons 100% increased damage. If one dies, the other gains Twilight Fury and the pull is over
- Tank the dragons at least 15 yards apart. Closer than that also triggers Twilight Bond. Never stand behind either dragon because Tail Lash and Impale will wreck you
- Gloom soaking requires alternating groups. Players who soak gain Diminish for 1 minute, meaning they cannot safely soak again until it expires
- At 100 energy, both dragons fly together for Midnight Flames. Get inside the Radiant Barrier provided by the Lightbound NPCs or die
- Recommended comp: 2 tanks, 2 to 5 healers depending on group size, lust on pull.
- Vaelgor & Ezzorak drop the Legs tier token Corrupted Nullcore
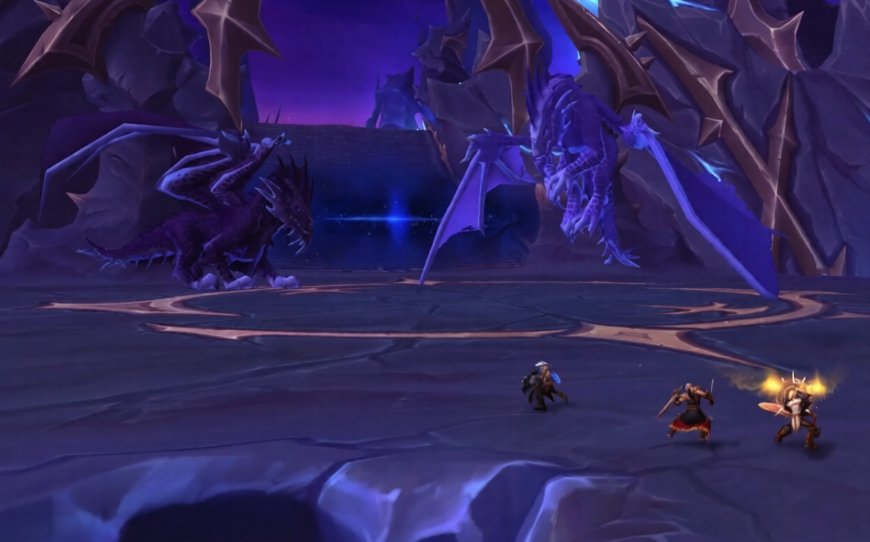
Fight Overview
This is a double dragon encounter. Vaelgor and Ezzorak are corrupted clutchmates from the red dragonflight. They do not share a health pool. The entire fight revolves around keeping their health balanced, managing space, and surviving their combined intermission.
Method described this fight as a full nostalgia trip for anyone who remembers classic dragon encounters. Every dragon has a Tail Lash, every boomer in your raid gets to say "back in my day" and they are not wrong. Stand behind either dragon for even a second and you deserve what happens.
Players on the WoW forums have called this fight overtuned for Normal difficulty, saying it feels like a late raid Heroic boss. The mechanics are unforgiving and the fight lasts for quite a bit of time, so come prepared.
Core Mechanics
Twilight Bond: The Balance Check
The dragons are linked. If their health percentages differ by more than 15% on Normal (10% on Heroic and Mythic), they gain 100% increased damage until the health is rebalanced. They also trigger this bond if they are closer than 15 yards to each other. If one dragon dies, the survivor gains Twilight Fury, a stacking damage buff that quickly wipes the raid.
Split your DPS evenly. Assign half the raid to each dragon and commit to that assignment. Cleave from the middle where both are reachable but do not accidentally push one dragon's health too far ahead.
Positioning
Tank the dragons near where they spawn, close to the 15 yard limit so cleave players can hit both. The raid stands between them and attacks from the sides. Both dragons have rear cone attacks: Vaelgor uses Tail Lash (knockback plus bleed) and Ezzorak uses Impale (knockback plus bleed plus 3 second stun). Never point the back of either boss toward the raid.
Tank Mechanics
Each dragon has its own ramping tank mechanic. Vaelwing empowers Vaelgor's melee attacks with stacking shadow damage that resets when it hits a new target. Rakfang empowers Ezzorak's melee attacks with a stacking healing absorb that also resets on a new target.
Swap after Gloom casts because that is the cleanest window. The dragons need to stay 15 yards apart which makes swap timing awkward, so plan your movement.
Gloom Soaking
Ezzorak fires Gloom in the direction he is facing. It travels to the edge of the arena and explodes into a permanent Gloomfield puddle. The puddle reduces movement speed by 75% and deals ticking damage. It is permanent. If you let it land unshrunk, the arena disappears fast.
Players can shrink the puddle by touching the Gloom orb as it travels. Up to 7 players can soak, each one reducing the final puddle size. Players who touch Gloom get Gloomtouched, a stacking DoT. On Heroic, Gloomtouched also applies Diminish when it expires, a 1 minute debuff that increases Gloomtouched damage taken by 500%. If a player with Diminish soaks Gloom again, they take lethal damage.
Alternate soaking groups. At least 5 ranged players should touch each Gloom on the way to minimize puddle size. Use markers to aim where the Gloom travels.
Void Howl and Voidorbs
Ezzorak marks all players with circles that, after a delay, deal damage to nearby players and spawn a Voidorb at each location. These orbs permanently cast Voidbolt at random players until killed. The damage stacks and gets out of control fast.
Stack as tight as possible before the circles resolve so the Voidorbs spawn grouped. Then use AoE, stuns and interrupts to kill them before Voidbolt free casts into the raid. Mass Grip from a DK is extremely helpful here. Method specifically noted this fight "silently judges your comp" if you do not have one.
Nullbeam and Nullzone
Vaelgor fires Nullbeam in a frontal channel at the tank for 4 seconds. Each hit stacks a shadow DoT. When the channel ends, it creates a Nullzone that tethers all players and pulls them toward the center.
Every player needs to snap their tether by moving 10 yards past the initial radius. Each snap deals raid wide damage via Nullsnap. The tank snaps last because the final snap (when no other tethered players remain) triggers a Nullzone Implosion which hits significantly harder.
More Nullbeam stacks on the tank means a weaker pull. Having at least one additional player soak some of the beam with the tank helps reduce the Nullzone's strength.
Dread Breath
Vaelgor targets a random player with Dread Breath, a massive frontal cone that fears anyone caught in it. The targeted player needs to step to the side away from the raid and stay close to the boss to minimize the cone's reach. Healers should be ready to dispel the fear immediately after it hits.
Midnight Flames: Intermission
When either dragon reaches 100 energy, both fly into the air and rain fire on the raid for 10 seconds (25 seconds on Mythic). This deals massive shadow damage every half second.
War Chaplain Senn (one of the Lightbound NPCs) provides a Radiant Barrier that absorbs Midnight Flames damage. Get inside the barrier or die. Note that 25% of Midnight Flames damage pierces the absorb, so healers still need to be active.
Players with Shadowmark from Midnight Manifestation adds should move to the edge of the barrier because it detonates when it expires, dealing damage to nearby players. Everyone else stacks in the center.
After the intermission, the dragons swap which one is grounded and which one is flying, then the cycle repeats.
Role Tips
Tanks: Keep the dragons 15 yards apart at all times. Swap after Gloom for the cleanest window. Vaelwing and Rakfang both ramp and reset on a new target, so do not delay swaps longer than necessary. During Nullbeam, face Vaelgor away from the raid. After the beam, snap your tether last to minimize Nullzone Implosion damage.
DPS: Balance damage between both dragons. Do not tunnel one. Stack tight for Void Howl to group the Voidorbs and AoE them down with stuns. Assign soak groups for Gloom with at least 5 players per orb. Players with Diminish sit out the next Gloom soak. Kill Voidorbs before Voidbolt stacks get out of control.
Healers: Biggest healing pressure comes during Midnight Flames (even through Radiant Barrier, 25% pierces), after Nullzone Implosion snaps, and when Gloomtouched DoTs stack on soakers. Dispel Dread Breath fears immediately. Coordinate cooldowns for the intermission because the ticking damage is relentless.
Vaelgor & Ezzorak Loot Table
Vaelgor & Ezzorak drop ilvl 240/253/266/279 gear depending on difficulty (LFR/Normal/Heroic/Mythic). This encounter drops the Legs tier token (Corrupted Nullcore) for all four armor classes.
Item | Slot |
Cloth Feet | |
Leather Hands | |
Mail Shoulders | |
Back | |
One Hand Mace | |
Trinket | |
Trinket |
Tier tokens (Legs slot):
Token | Classes |
Voidcast Corrupted Nullcore | Evoker, Hunter, Shaman |
Voidcured Corrupted Nullcore | Demon Hunter, Rogue, Monk, Druid |
Voidwoven Corrupted Nullcore | Warlock, Priest, Mage |
Voidforged Corrupted Nullcore | Death Knight, Paladin, Warrior |
Bonus drops: Plans: Blood Knight's Impetus (Blacksmithing recipe), Voidbound Holding Cell (housing decor)
Vaelgor & Ezzorak is where a lot of groups hit a wall. The mechanics are punishing even on Normal. If you want clean weekly clears without the progression headache, check Kingboost's Voidspire raid boost services.

Vaelgor & Ezzorak FAQ
How close can you keep the dragons?
At least 15 yards apart at all times. Closer than that triggers Twilight Bond, giving both dragons 100% increased damage. You want them close to the 15 yard limit for cleave value but never under it.
What happens if one dragon dies before the other?
The surviving dragon gains Twilight Fury, a stacking damage buff that escalates every 15 seconds. This is effectively a wipe. Both dragons need to die at roughly the same time.
How does Gloom soaking work?
Ezzorak fires a Gloom orb toward the edge of the arena. Players can touch it on the way to shrink the resulting puddle (up to 7 soakers). On Heroic, soakers get Diminish for 1 minute after Gloomtouched expires, preventing them from soaking the next Gloom safely. Alternate two groups of at least 5 ranged players.
Who snaps the Nullzone tether last?
The tank. Everyone else snaps their tether immediately by running 10 yards past the zone edge. Each snap deals raid wide damage. The final snap triggers Nullzone Implosion which hits significantly harder. The tank takes this so it only happens once.
When should you use Bloodlust?
On pull. There is no damage amplification window in this fight. The encounter is a consistent loop that gets progressively harder as Gloomfield puddles eat arena space. Getting maximum lust value early when the room is clean is the safest option.
Which tier token drops from Vaelgor & Ezzorak?
The Legs tier token (Corrupted Nullcore) for all four armor classes. This is one of the more impactful tier slots for completing a 4 piece set bonus.
What is the achievement for this boss?
Ready, Set, Snap!: defeat Vaelgor & Ezzorak after all players break each Nullzone's tethers within 3 seconds on Normal difficulty or higher.